Verify if Git is installed by using the following command in the command prompt:
git --version
Create your local Git repository
In your computer, create a folder for your project. Let’s call the project folder simple-git-demo.
Go into your project folder and add a local Git repository to the project using the following commands:
cd simple-git-demo
git init
The git init command adds a local Git repository to the project.
Let’s Add some Small Code now
Create a file called demo.txt in the project folder and add the following text into it:
Initial Content
Here we will be demoing with just plain text instead of actual code, since the main focus of this article is on Git and not on any specific programming language.
Staging and Committing the code
Committing is the process in which the code is added to the local repository. Before committing the code, it has to be in the staging area. The staging area is there to keep track of all the files which are to be committed.
Any file which is not added to the staging area will not be committed. This gives the developer control over which files need to be committed.
Staging
Use the following command for staging the file:
git add demo.txt
In case you want to add multiple files you can use:
git add file1 file2 file3
If you want to add all the files inside your project folder to the staging area, use the following command:
git add .
Use this carefully since it adds all the files and folders in your project to the staging area.
Committing
Use the following command to commit the file:
git commit -m "Initial Commit"
“Initial Commit” is the commit message here. Enter a relevant commit message to indicate what code changes were done in that particular commit.
Git Status and Git Log
Now modify the demo.txtfile and add the following snippet:
Initial Content
Adding more Content
Status
Use git status to find out information regarding what files are modified and what files are there in the staging area — it shows other information as well, which we can ignore for now.
Use the following command to see the status:
git status
The status shows that demo.txt is modified and is not yet in the staging area.
Now let us add demo.txt to the staging area and commit it using the following commands:
git add demo.txt
git commit -m "demo.txt file is modified"
Log
Use git log to print out all the commits which have been done up until now.
The command used for this is: git log
The log shows the author of each commit, the date of the commit, and the commit message.
Branches
Up until now we have not created any branch in Git. By default, Git commits go into the master branch.
What is a branch?
A branch is nothing but a pointer to the latest commit in the Git repository. So currently our master branch is a pointer to the second commit “demo.txt file is modified”.
Why are multiple branches needed?
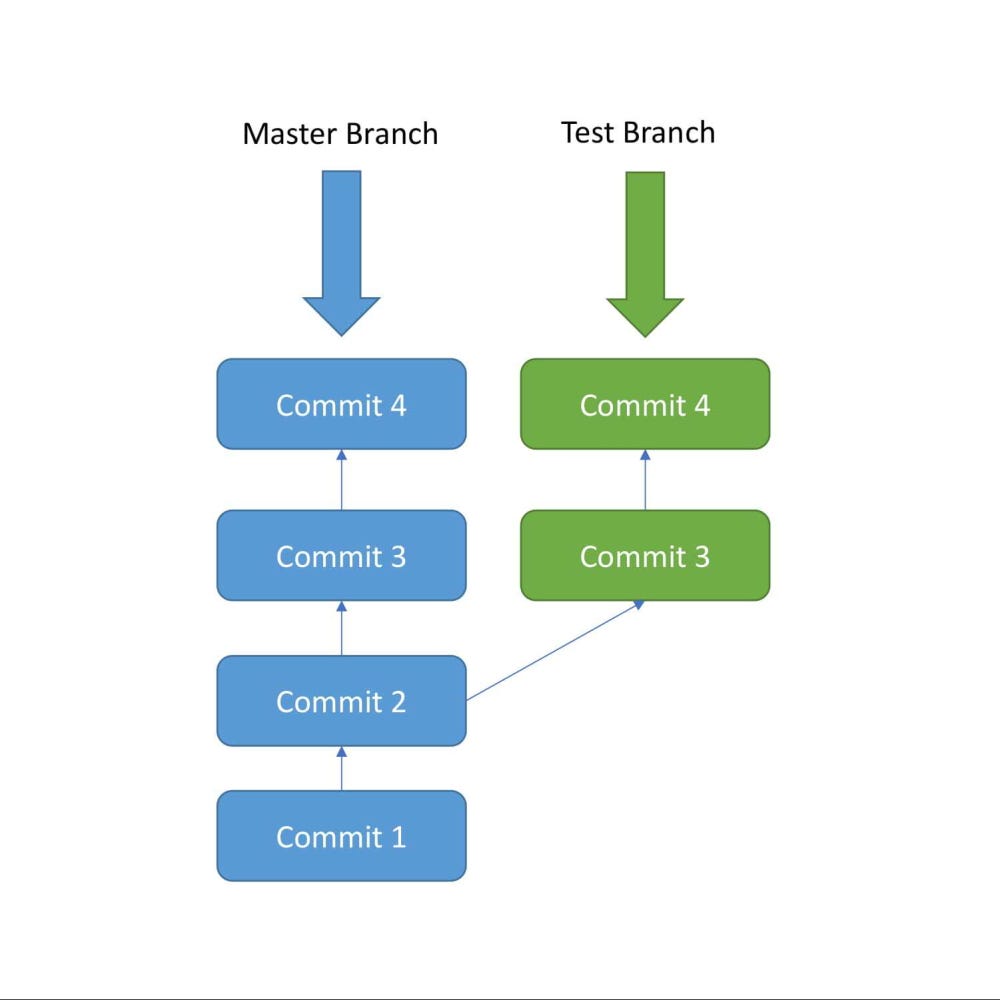
Multiple branches are needed to support multiple parallel developments. Refer the image below to see how branches work.
Initially, commit 1 and commit 2 were done in the master branch. After commit 2 a new Branch called as “Test” is created, and commit 3 and commit 4 are added to the test branch.
At the same time, a different commit 3 and commit 4 are added to the master branch. Here we can see that after Commit 2, two parallel developments are being done in 2 separate branches.
The Test Branch and the Master Branch have diverged here and have different code — the code from Test Branch can be merged with the Master branch using git merge. This will be covered later.
Create a New Branch in Local
Create a new branch called test using the following command:
git branch test
This command creates the test branch.
We are still in the context of the master branch. In order to switch to the testbranch. use the following command:
git checkout test
Now we are in the test branch.
You can list out all the branches in local using the following command:
git branch
Do Some Commits in the New Branch
Modify demo.txt by adding the following snippet:
Initial Content
Adding more Content
Adding some Content from test Branch
Now stage and commit using the following commands:
This commit was done in the Test Branch, and now Test Branch is ahead of Master Branch by 1 commit — as the test branch also includes the 2 commits from the master branch.
You can verify the commit history in Test Branch using:
git log
Merging
Currently, Test Branch is ahead of the Master by 1 commit. Let’s say that now we want all the code in the Test Branch to be brought back to the Master Branch. This is where git merge is very useful.
In order to merge the code from the test branch into the master branch, follow these steps:
First go back to the master branch:
git checkout master
Then run the merge command:
git merge test
After running these 2 commands, the merge should be successful. In this example, there are no conflicts.
But in real projects, there will be conflicts when a merge is being done. Resolving the conflict is something which comes with experience, so as you work more with Git you will be able to get the hang of resolving conflicts.
Run git lognow and you will notice that the master also has 3 commits.
The Remote Git Repository
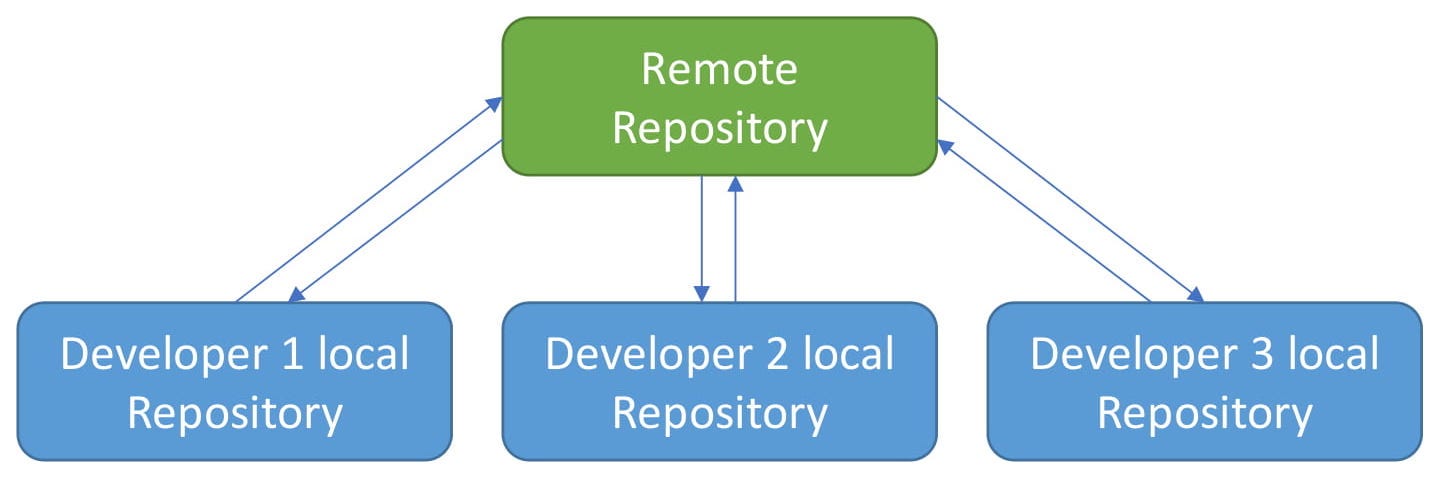
Until now, we have been working only in the local repository. Each developer will work in their local repository but eventually, they will push the code into a remote repository. Once the code is in the remote repository, other developers can see and modify that code.
Showing Remote and Local Repositories
GitHub
Here we will be using GitHub for the remote repository.
After registering in the GitHub homepage, click on Start a Project to create a new Git repository. Give the repository a name and click “Create Repository”
Give the name as git-blog-demo.
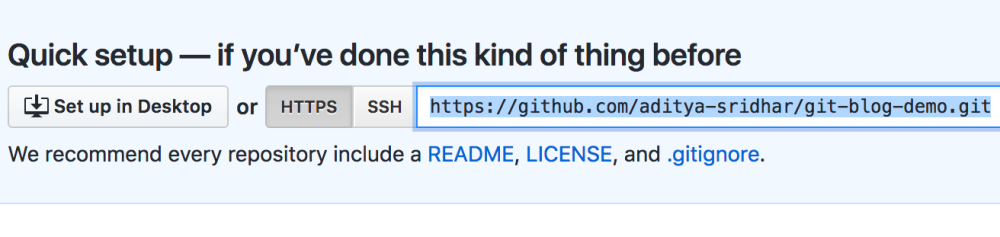
This will create a remote repository in GitHub, and when you open the repository, a page like the image below will open up:
The repository URL is the highlighted portion https://github.com/aditya-sridhar/git-blog-demo.git
In order to point your local repository to the remote repository, use the following command:
git remote add origin [repository url]
Git Push
In order to push all the code from the local repository into the remote repository, use the following command:
git push -u origin master
This pushes the code from the master branch in the local repository to the master branch in the remote repository.
Additional Commands
Git Pull
git pull is used to pull the latest changes from the remote repository into the local repository. The remote repository code is updated continuously by various developers, hence git pull is necessary:
git pull origin master
Git Clone
git clone is used to clone an existing remote repository into your computer. The command for this is:
git clone [repository url]
Congrats
Now you know the basics of how to use Git, so go ahead and explore more!
I will soon be publishing one more article on slightly more advanced concepts of Git. Stay tuned!

0 comments:
Post a Comment